Cookbook Review: Eat Happy

Eat Happy | 30-Minute Feelgood Food by Melissa Hemsley

Eat Happy

Published by Ebury Press

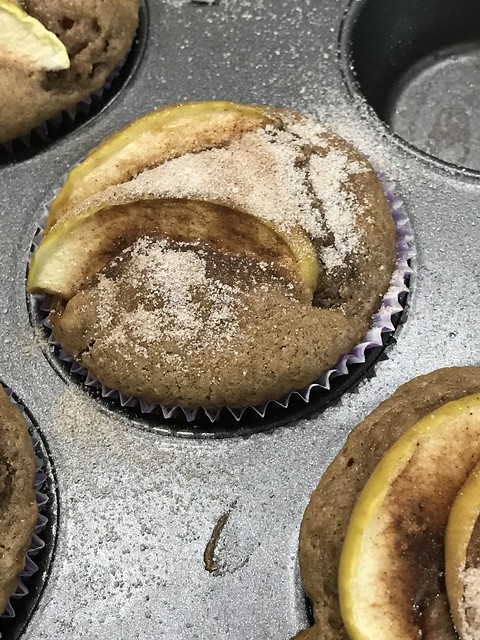
Food on the table in 30 minutes is a life-saver on busy weeknights and this cookbook shows how to do it without opening packets or jars of pre-prepared ‘things’.   With a zero-waste approach to food, Melissa provides plenty of ideas on how to use up ingredients such as swapping out cabbage with pak choi, broccoli or other leafy greens for Monday miso noodle soup or replacing half the grated apple with grated carrot for a more ‘carrot cake’ flavour in the ‘Apple Pie’ buckwheat porridge.

The last recipe in the ‘Bowl Food’ chapter is the ‘Waste not, want not bowl’ which is more guide than recipe and a wonderful way to use up bits and pieces to make a delicious nutritious meal.  Melissa’s Filipino heritage is evident in the panoply of flavours and yet most ingredients are readily available from the supermarket.  Our dinner-in-a-hurry repertoire will be expanded with some new flavours beginning with Korean chicken with sesame sprinkle and Filipino-style steak and onions.

Other recipes by Melissa Hemsley and by Jasmine Hemsley can be found on their websites.

Easy granola - Eat Happy | Melissa Hemsley

Recipes from the book that we’ve tried:
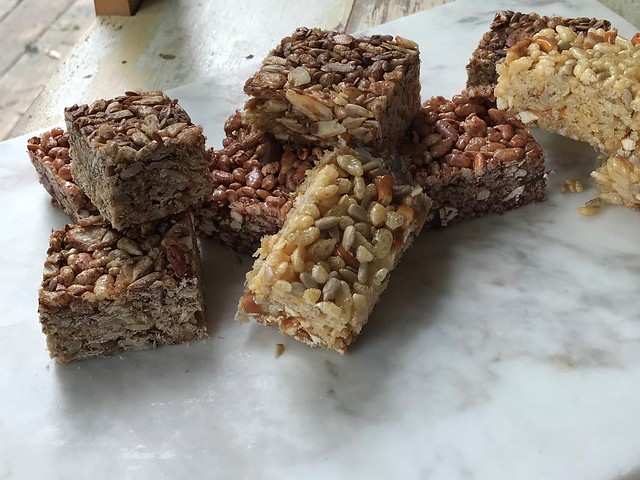
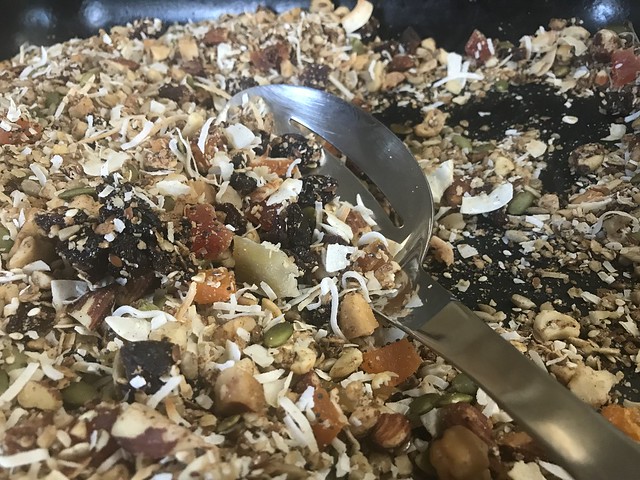
Easy granola

Easy granola - Eat Happy | Melissa Hemsley

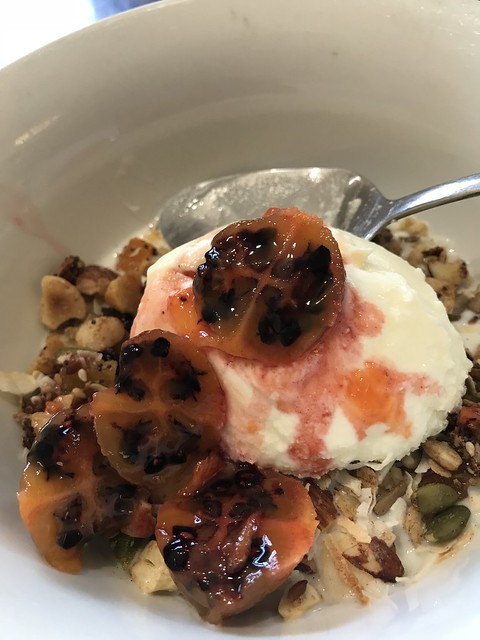
Granola is toasted muesli in NZ (Kiwi) lingo.  Homemade muesli/granola is a staple in our house and I have a handful of recipes that I make again and again as I can be sure the kids will eat them.  I had committed to making Melissa’s easy granola before I realised I didn’t have all the ingredients, and by committed, I mean I had already started measuring out the ingredients.  And that’s the great thing about granola and muesli recipes, they’re very easy to adapt to what you do have in the pantry.   Instead of all quinoa flakes, I had to use some rolled oats, and in place of maple syrup, I used Wild Kithul Treacle.  That might sound a bit flash but I used it simply because I’d bought it a while ago thinking it sounded interesting and then never used it.  The flavour is similar to a burnt toasty caramel coconut.  I also didn’t have enough coconut flakes so threaded coconut came to the rescue.  With all the adaptations, it could be argued that I didn’t really make Melissa’s recipe but I did keep to the 400 g mixed nuts and 400 g mixed seeds.  I’m glad I did as the end result is deliciously nutty – my regular recipes err on the ‘no nuts’ side to keep the kids happy so this is a breakfast The Anster and I can eat all to ourselves.  The recipe can be found here.

Veggie cottage pie with cauliflower mash

For a recent potluck dinner, my dishes of choice were one vegan (Buckwheat and mushroom risotto) and one vegetarian.  A local lad and friend of ours, who lives in a family that eats predominantly vegan food, asked me what had gone wrong when I mentioned what I had made.  I’m guessing he was hoping for a meat-feast and was sadly disappointed.  However, with cottage pies such as this one, the minced meat versions are decidedly second rate.  I’m thinking of making this my go-to cottage pie recipe, it’s that good.  I pretty much stuck to the recipe on this one apart from the courgettes.  Being as it is winter and courgettes cost about $5.00 each, I used some grated frozen courgette left over from summer.  And I cooked the lentils from scratch since I had the time and energy.  Another note, our farmers-market cauliflower’s must be monsters as the ingredient list calls for 2 cauliflowers, about 800g in total.  One cauliflower weighed more than that in itself and the stall owner charged me less as he deemed it to be a bit on the small side.

Cinnamon and Almond Rice Bubble Slice

Bliss balls and raw vegan slices are wholesome and nutritious, but they are also quite expensive to make.  So far my family haven’t embraced my efforts at making squeaky “clean” treats, so I have dialled back quite a bit on the “superfood” additions.

Cinnamon & Almond Rice Bubble Slice

The result so far is this recipe which is based on the old-fashioned rice bubble slice but with the addition of some nuts and seeds and a little spice, it is more nutritious than the original slice but not so hard on the budget as the maxed-out wholefood versions.

Cinnamon and Almond Rice Bubble Slice

Ingredients

120 g butter

50 g (¼ cup) brown sugar

75 g (3 T) honey

2 tsp vanilla extract

75 g (3 cups) puffed rice

1 ½ cup sliced almonds

140 g (1 cup) sunflower seeds

3 tsp ground cinnamon

Method

Place butter, sugar and honey in a small pot over medium heat.

Heat until the sugar is dissolved then bring to the boil. Simmer for about 3 minutes, the mixture should be syrupy.

Place the remaining ingredients into a large bowl. 

Once the syrup is ready, remove from the heat and pour over the rest of the ingredients. Mix thoroughly, making sure all the dry ingredients are covered with the sticky syrup.

Press firmly into a greased & lined 18 x 27 cm baking tin then place in the refrigerator to set.

Cut into 20 -24 pieces and store in an airtight container in the fridge to keep the slice firm.

Pretzel and Caramel Rice Bubble Slice

120 g butter

50 g (¼ cup) brown sugar

75 g (3 T) honey

2 tsp vanilla extract

75 g (3 cups) puffed rice

105 g (1 ½ cups) roughly chopped pretzels

70 g (½ cup) sunflower seeds

80 g (½ cup) diced soft caramels

Make as above.

Chocolate and Raspberry Rice Bubble Slice

120 g butter

50 g (¼ cup) brown sugar

75 g (3 T) honey

2 tsp freeze-dried raspberry powder

75 g (3 cups) puffed rice

20 g (1 ½ cups) multi-puffs

75 g (½ cup) chopped dark chocolate

80 g (½ cup) diced soft raspberry liquorice

Make as above.

Variations:

Salted Caramel and Pretzel – replaced the slivered almonds with lightly crushed pretzels, and replace ½ cup of the sunflower seeds with diced (soft) caramels.  Omit the cinnamon if desired.

Tropical Coconut – replace the slivered almonds with a combination of coconut flakes and shredded coconut (about half each) and use finely diced dried tropical fruit such as papaya, pineapple and mango.  Omit the ground cinnamon and use extra vanilla flavouring if desired (I added 1 tsp of vanilla powder in addition to the vanilla extract)

Mocha – add 3 teaspoons of freeze-dried coffee granules to the butter & sugar mixture, replace the almonds with another other nut or a mixture of nuts and replace sunflower seeds with dark or milk chocolate chips.  Omit the cinnamon.

Orange and Walnut – replace the slivered almonds with roughly chopped walnuts.  Replace the ground cinnamon with 3 tsp of grated orange zest.

Very Seedy Nut-Free: replace the 1 ½ cups of slivered almonds with a mixture of other seeds such as pumpkin seeds, linseeds (flaxseeds), poppy seeds, and chia seeds

Lemon, white chocolate and poppy seed: replace the slivered almonds with corn flakes and add ¼ cup of poppy seeds, and replace the sunflower seeds with ¾ cup of white chocolate drops.  Omit the ground cinnamon and add 3 tsp freshly grated lemon rind.

Easter Bubble Slice: use golden syrup instead of honey, and remove the almonds and sunflower seeds.  Add 1 cup of currants, ½ cup citrus peel and 1 cup of traditional rolled oats.  Use only 2 tsp of ground cinnamon and add 1 tsp of mixed spice. 

Dairy Free Apple Muffins

Dairy-Free Apple Muffins
I’ve had the recipe leaflet for Dairy Free Apple Muffins from Countdown supermarket stuck to the freezer for ages and keep thinking I should make them one day.

One day finally happened ……. and now this recipe is filed in the ‘I should make these again one day’ section as they’re pretty good muffins.

The original recipe is here; I have tweaked the recipe in a very minor way by using ingredients I prefer to use.

Dairy-free Apple Muffins

Ingredients

1 medium egg
250 ml (1 cup) non-dairy milk
125 ml (1/2 cup) mild-tasting olive oil
300 g (2 cups) plain white flour
1 1/2 teaspoon baking powder
1 teaspoon baking soda
1 1/2 teaspoons ground cinnamon
2 Granny Smith apples
150 g (3/4 cup) brown sugar
1/2 teaspoon ground cinnamon, extra
2 teaspoons caster sugar

Instructions

Preheat the oven to 180°C (160°C fan-forced).

Lightly grease or line a 12-hole muffin pan.

Place the egg into a small bowl and whisk until it is lightly beaten. 

Add the non-dairy milk and oil and whisk to combine.

Sift the flour, baking powder, baking soda and ground cinnamon into a large bowl.

Finely dice one of the apples (removing and discarding the core, but keeping the peel) into the flour.

Add the brown sugar into the egg mixture and stir to combine and break up the sugar (if required).

Add the wet ingredients to the dry and gently fold until the ingredients are just combined. 

Divide the mixture evenly between the 12 muffin cases.

Slice the other apple into 24 even slices (discarding the core but keeping the peel).

Place two slices on the top of each muffin. 

Bake for 20 minutes or until they spring back when lightly pressed.

Combine the second measure of ground cinnamon with the caster sugar and evenly sprinkle over the top of the hot muffins.

Set aside to cool for 10 minutes before removing from the muffin tins and allowing to cool completely on a wire rack.

Store in an airtight container and eat within 2-3 days.

My adjustments:

  • I have added in measurements in mls and grams for more precise measurements as not all cups are created equal the world over.
  • I use lactose-free milk or almond milk instead of soy milk.
  • I use a mild tasting olive oil, also referred to as lite olive oil, instead of vegetable oil.
  • I rarely have self-raising flour on hand so I just use regular flour and add baking powder (1 teaspoon of baking powder to 1 cup of regular flour).
  • I misread the original recipe and added all of the cinnamon into the mixture but I like the spicy flavour so I will continue to make them that way.
  • I often don’t peel the apples, just wash them well.
  • I thought that 3 teaspoons of caster sugar from the original recipe was almost too much to sprinkle on top as I ended up going back over already-sprinkled muffins just to use it all up so I have reduced the sugar down to 2 teaspoons.

Lemon and Berry Tiramisu

Lemon & Berry Tiramisu
Tiramisu, Italy’s version of English Trifle, is usually flavoured with coffee and chocolate however I have taken a fruity approach to create a summery dessert to suit our Southern Hemisphere climate. I made a Lemon & Raspberry version however the Lemon & Mixed Berry version is more suitable if you have a berry patch out the back like I do.  I have all sorts of berries ripening but usually just a handful or two of each – not 2 1/2 cups worth (yet – maybe next year).  I have used blueberries, strawberries, boysenberries, raspberries (red, ebony (black) and ivory (white)), as well as all the different hybrid berries we are growing (loganberries, tayberries, berry delight, ranui berries and aurora berries).  The larger berries I have cut in half or smaller so they don’t poke up out of the sabayon too much.
Home-grown Berries
I have also made this tiramisu with both stale trifle sponge and the Savoiardi.  I prefer the sponge finger biscuits as they hold their shape a little better for longer.  I haven’t yet attempted to make my own sponge finger biscuits but only because I was a little pushed for time.  Having made 6 tiramisu in the last couple of weeks, I would like to try making my own sponge finger biscuits so I don’t have to keep traipsing down to the store to buy yet another packet of sponge finger biscuits.  To use a trifle sponge – leave it out set on a cake rack so it dries out.  This will help it disintegrating into a pile of Limoncello flavoured mush.
Sponge Finger Biscuits (Saviordi)
Use any remaining Limoncello tea syrup to make a delicious punch or add some gelatine and set it into a shallow dish.  I added an extra teaspoon of gelatine so it is a firm set then cut the jelly into squares and store it in the fridge – Mr L likes to have one or two squares with his morning tea snack.

As this dessert has fresh berries, it is best eaten on the day it is prepared and any leftovers cleaned up the following day.
Lemon & Berry Tiramisu

Lemon and Berry Tiramisu

125 ml (½ cup) water
Juice and zest of 1 medium sized lemon (results in about 1 T lemon zest and ¼ cup lemon juice
55 g (¼ cup) white sugar
1 lemon-flavoured black tea bag
60 ml (¼ cup) Limoncello
6 medium egg yolks
85 g (6 T) vanilla sugar
90 ml (6 T) Limoncello
250 ml (1 cup) cream
200 g mascarpone
200 g Saviordi biscuits
3-4 cups of mixed fresh berries
¼ cup sliced almonds
¼ cup grated white chocolate

Method

Heat the water, lemon zest, juice and white sugar together over medium heat, stirring, until the sugar is dissolved.  Bring to a boil, boil for five minutes then remove from the heat.  Add the tea bag and set aside to cool.  Remove the tea bag and stir in the first measure of Limoncello.  Set aside until required.   Makes about 1 cup.

Whisk egg yolks in a heat-proof bowl. Set over a bain-marie or double boiler.  While whisking (with an electric hand mixer) add sugar and Limoncello gradually, beating all the while making sure the water is on a very low heat (a bare simmer).  Beat until the mixture is thick, foamy and a pale lemon colour (about 10 minutes). Remove from the heat and place in a cold-water bath and continue beating until the mixture is cool.  Whip the cream until soft peaks form in a clean bowl.  Gently fold the cream and the mascarpone into the egg mixture.  Once all incorporated, cover and chill until required.

Soak the Saviordi or stale sponge pieces in the Limoncello tea syrup for a couple of seconds then place in a single layer in a 20 x 15 cm serving dish, trimming biscuits if needed.  Add 1 ½ cups of fresh berries.  Spoon over half the custard (about 2 ½ cups).  Place another layer of soaked Saviordi then repeat with another 1 ½ cups berries and custard.  Cover and chill until ready to serve.  To serve, garnish with crumbled remaining Saviordi biscuits, extra fresh berries, sliced almonds and finely grated white chocolate.

Note:

In attempt to reduce the dairy content of the Tiramisu, I also made a version that used whipped egg whites instead of the whipped cream.  To do this, reduce the amount of sugar whisked into the egg yolks by 1/4 and set it aside.  Once the egg yolks and sugar are whisked together and cooled, whisk in the drained yoghurt (see below).  In another bowl, whisk the egg whites until soft peaks form, then whisk in the sugar set aside when making the egg yolk mixture.  Fold the whipped egg whites into the egg yolk mixture, gently incorporating the two mixtures until combined.  Cover and store in the fridge until required.  Occasionally, the sabayon may separate a little – just fold together gently again before layering up the dessert.

Drained Yoghurt

I also replaced the mascarpone with drained yoghurt (or yoghurt cheese as it is sometimes called).  As my dairy-intolerant daughter can tolerate yoghurt, I just used a natural unsweetened yoghurt however if all dairy is an issue – I suggest draining a non-dairy yoghurt such as coconut milk yoghurt.  To drain yoghurt, place a sieve over a bowl.  Rinse a clean cheesecloth and place it in the sieve.  Scoop the yoghurt out into the sieve, cover it with a loose cover or a second cheesecloth.  Set aside and leave to drain for about 4-5 hours (it can be placed in the refrigerator to drain also).  Once the yoghurt is thick and of a consistency similar to cream cheese or mascarpone, it is ready to use as you would either of those products.  The liquid that has drained out is whey and can be used in baking.

Block of Choc Brownie

IMG_5464
This brownie is very easy and quick to whip up when unexpected visitors arrive and it can be served with coffee or as a dessert.  Use one bowl and there is very little to clean up.  The finished brownie is crunchy around the edges, chewy on top and moist in the middle.  If you like chewy more than gooey, leave the brownie in the oven for an extra 3-4 minutes.  White sugar will give a crustier top than raw sugar. I usually make this brownie with 72% cocoa dark chocolate to keep it dairy-free however the 33% cocoa with toasted coconut is extremely popular.  Any of the nut chocolates work well as does white chocolate.  Chocolate with a flavoured toffee shard such as mint or hokey-pokey turn out a delicious but sticky brownie as the toffee shards melt and sink to the bottom.
IMG_5465_cr

Block of Choc Brownie

Ingredients

4 medium eggs
200 ml lite olive oil
50 ml almond milk (or other non-dairy milk alternative)
2 teaspoons vanilla extract
400 g (2 ½ cups) raw sugar
70 g (2/3 cup) cocoa powder
75 g (½ cup) white flour
1 teaspoon baking powder
250 g block of chocolate, roughly chopped

Method

Preheat oven 160°C and grease and line a 33 cm x 23 cm slice tin.

Place eggs, oil, milk and essence into large bowl and whisk until combined. 

Sift in cocoa powder, flour and baking powder. 

Add sugar and chocolate and stir until combined.

Pour brownie batter into prepared baking tin. 

Bake for 40-45 minutes for moist & gooey in the middle chocolate brownie or leave in the oven for a little longer if you like the brownie chewy all the way through.

Remove from the oven and leave to cool.

Cut into pieces (between 20 – 24 pieces) and dust with icing sugar to serve. 

IMG_5461

Variation: Toasted Coconut Brownie

Use the 33% cocoa milk chocolate block with toasted coconut, use coconut milk instead of almond milk.  Sprinkle the brownie with ½ cup toasted chocolate chips before placing in the oven.

Variation: Dark Gingerbread Brownie

Use 62% or 72% dark chocolate and add 2 teaspoons of gingerbread spice mix when adding the flour.  Sprinkle brownie with ½ cup chopped crystallized ginger before placing it in the oven.

Gingerbread Spice Mix

2 teaspoons ground ginger
1 teaspoon ground cinnamon
½ teaspoon ground cloves
½ teaspoon ground nutmeg
Combine spices in a small airtight jar.

Beets and Beans Salad

2017-10-03 18.10.52
This recipe was partly inspired by a recipe for a beetroot, carrot and bean slow cooker casserole from Sara Lewis’ Ultimate Slow Cooker cookbook. The remaining “inspiration” was more like desperation when I needed to come up with some sort of dish to take to a pot luck dinner and the fridge was fairly bare apart from plenty of beetroot and carrots.  A salad was thrown together and turned out to be one that the family voted a ‘make again’.  It has been through several tweaks and trials and each has been a success with a different member of the family.  So it can be changed according to what you have available: use brown onions instead of red and green or savoy instead of red cabbage.  The cabbage can be lightly steamed instead of raw and the green beans left out completely or swapped for another green vegetable such as broad beans or broccoli.  The amount of dressing is enough to coat the vegetables and it can be incorporated before serving. Omit the garlic aioli if desired (or use mayonnaise instead) although I like the slight tang it adds to the dressing.  The salad is filling enough to be served as a main course and any left overs are perfect for lunch the next day.
2017-10-03 18.10.03

Beets and Beans Salad

Salad

1 x large red onion

6 x medium beetroot

6 x medium carrots

Salt & freshly ground black pepper

2 tablespoons olive oil

¼ of a red cabbage

2 x 425 g tins mixed beans

2 cups frozen green beans

2 spring onions

¼ cup fresh mint leaves

Dressing:

75 g goat feta

65g natural unsweetened yoghurt

100g cucumber and mint yoghurt dip

2 T garlic aioli (optional)

Method

Peel the red onion and cut in half width-wise, then cut each half into 8 wedges.  Peel or scrub the beetroot and cut into bite sized pieces.  Peel or scrub the carrots and cut into bite sized pieces (the cut vegetables should all roughly be the same size). There should be about 3 cups of beetroot and 3 cups of carrot.

Place the prepared vegetables into a large roasting dish – to keep the beetroot from colouring all the carrots, place the beetroot at one end, the carrots at the other and the red onion in between.  Season with salt and freshly ground black pepper then drizzle over the olive oil.  Give the pan a shake to settle the vegetables into an even layer then roast at 200°C for 30 minutes.  Stir (adding a little more oil if required), then roast again for a further 15-20 minutes until the vegetables are cooked.

While the vegetables are roasting, prepare the remaining ingredients.  Finely slice the cabbage, as if cutting for coleslaw (there should be about 3 cups). Rinse the tinned beans and drain well.  Lightly steam the green beans until just cooked.  Slice the spring onions and mint leaves finely.

To make the dressing: mash the feta with a fork.  Scrape it into a bowl, add the yoghurt and whip the ingredients together with a fork.  Add the dip and aioli (if using) and stir to mix the ingredients together well.

Pile the cabbage and beans onto a large serving platter.  Add the roasted vegetables and lightly toss the ingredients together.  Sprinkle with the spring onions and mint leaves.  Serve the dressing alongside.

Serves 4-6

Potato Raclette Bake

This dish is inspired by a delicious meal of Raclette cheese with boiled potatoes and crispy bacon that we enjoyed in Switzerland and an equally delicious Tartiflette I ordered in Versaille thinking I was ordering some sort of tart but was instead a potato bake.

As Raclette Grills are uncommon here in New Zealand, I have borrowed the idea from the Tartiflette and used the oven to melt the cheese.  The cheese is the star of this dish so use the greater quantity if desired.  Substitute a different sort of melty cheese (try Gruyere or Emmental) or use camembert or brie which heads more in the Tartiflette direction.  Waxy salad or boiling potatoes such as Nadine, Draga or New Season Perlas work best but an all-purpose potato (Moonlight, Vivaldi Gold) will also work ok.
2017-08-30 09.58.47-1 (1)

Potato Raclette Bake (Loaded Potatoes)

Ingredients

1.2 kg small waxy potatoes

2 cloves garlic

150 g chunk of Pancetta or Bacon

200 g small mushrooms

½ red capsicum

½ green capsicum

3-4 shallots

1 tablespoon butter

150-250 g Raclette cheese

Cornichons, optional

Pickled onions, optional

Method

Preheat the oven on to 175ºC on grill (top heat only).

Scrub or peel potatoes.  Boil in salted water until just tender. Drain and set aside.

Crush the garlic. Cut the piece of Pancetta into slices about 5 mm thick, then into batons (lardons). Clean the mushrooms and cut in half. Half and deseed the capsicum then slice thinly. Peel and quarter the shallots.

Melt the butter a large skillet or frying pan. Add garlic, Pancetta, mushrooms, capsicums and shallots.

Cook over medium heat for about 5-7 minutes.

Remove from the heat and transfer to an oven-proof dish if required.  Nestle the potatoes into mixture, making sure the dish is large enough to hold the ingredients in a single layer.

Thinly slice the Raclette and place evenly over the top.

Place in the oven in the top third of the oven. Grill at 175ºC for about 7-10 minutes, keeping an eye on the cheese.  Once it is melted and bubbly it is ready.

Serve immediately with baby gherkins (cornichons) and pickled onions alongside.

Cookbook Review: Little Bird Goodness

Little Bird Goodness by Megan May, Penguin Random House New Zealand

Little Bird Goodness
For many people, food intolerance is a huge interruption to everyday life.  Product availability has improved with gluten-free, wheat-free, dairy-free, refined sugar-free, or egg-free items now being available in many mainstream grocery stores.  Larger cities also have the luxury of vegetarian, vegan or raw food café’s such as Megan May’s award-winning Unbakery Café’s.

With the release of her first cookbook The Unbakery, raw food became more accessible to people living outside of the main centres or without access to café’s catering to specialist eating programs.  Little Bird Goodness, Megan’s second cookbook, is aimed at a larger group of people, not just those already eating raw food.  These recipes are all plant-based but some include a cooked portion to help newbies ease into this type of eating.

Thankfully, only one of our family members suffers from a food allergy/intolerance, but the vitality and enthusiasm of Megan for eating a plant-based diet encourages me to try to incorporate more raw components into our diet.  Simple ideas such as Watermelon dipped in citrus spice mix, chocolate-dipped dried fruit or green superfoods popcorn all look delicious, fresh and healthy snack choices.  The spiced pumpkin salad with caramelised shallot dressing would also fit into our diet without too much trouble ie ordering in a raft of new exciting ingredients.

At the back of the book, the Basics section covers sprouting, (sprouts are fundamental to a raw food diet), as well as fermented foods such as kefir, yoghurt, kimchi and sauerkraut all of which are easy and very satisfying to make.

Each recipe includes an equipment needed list which is useful to know before beginning a recipe, particularly as some equipment specified is not what an everyday regular kitchen would have, such as a cold brew coffee maker or a cold-press juice extractor.

First up on my list of recipes to try is the Pea Guacamole and the popcorn.  Megan also shares recipes on her website and for Bite Magazine (such as this delicious-looking intriguing-sounding Winter Spice Buttercup Cake with Coconut Cream Frosting.

Prune & Cardamom Biscuits (Cookies)

Prune & Cardamom Biscuits (Cookies)This recipe was created to use a bag of diced prunes that were purchased (in error) instead of whole prunes.  The result were biscuits so tasty that I had to make them again – this time using whole prunes that I diced and dusted in a little flour so they didn’t clump together otherwise all the prune would end up in just a few of the biscuits.
Prune & Cardamom Biscuits (Cookies)

Left to right: Prune & Cardamom, Double Chocolate & Ginger, Apricot & Almond

Prune & Cardamom Biscuits

Ingredients

170 g butter, melted

200 g (1 cup) brown sugar

125 g (½ cup) white sugar

1 tsp vanilla extract

2 eggs

300 g (2 cups) pure plain flour

½ tsp baking soda

2 tsp ground cardamom

150 g (3/4 cup) dark chocolate drops

150 g (3/4 cup) diced prunes

Method

Preheat oven to 165ºC

Grease or line a baking tray.

Combine melted butter and sugars in a large bowl and whisk until well blended.

Whisk in vanilla and eggs until the mixture is light and creamy.

Sift in flour, baking soda and cardamom.

Add the chocolate drops and diced prunes.

Stir the mixture well so all the ingredients are combined.

Refrigerate the mixture for at least 15 minutes.

Place spoonfuls onto the prepared baking tray about 8cm apart.

Bake for 15-20 minutes.

The biscuits are still soft once baked so leave on the tray for five minutes to firm up.

Transfer the biscuits to a wire rack to cool completely.

Store in an airtight container

Makes about 18-24 depending on the size of the spoon.

Variations:

Double Chocolate & Ginger Biscuits

Reduce the flour by ½ cup and replace with ½ cup cocoa powder

Replace ground cardamom with ground ginger

Replace diced prunes with diced crystallized ginger

Apricot & Almond Biscuits

Replace vanilla extract with almond extract.

Omit the ground cardamom

Replace the dark chocolate drops with slivered almonds

Replace diced prunes with diced dried apricots

The language of apples

Currently six weeks into a nine week holiday in the U.K. and Europe, it’s been interesting trying new foods in new countries.

Apple Travels

Right now I am in The Netherlands.  I don’t know much about apples here but they must be grown as I know several recipes that originate here showcase apples – Dutch apple pie or tart (appeltaart) for instance.  Dutch apple pie, as I understand it, differs from regular apple pie in that it has raisins and lemon flavouring.
Apple Travels
I thought I might see quite different varieties of apples in shops and supermarkets throughout Europe but they’re essentially the same varieties we have at home: Granny Smith, Fuji, Pink Lady ….. I’d have to venture out into the villages and shop at roadside stalls to get some of the older varieties and without a car, that isn’t always possible.
Apple Travels
So I am settling for apple products ie Cider.  I have tried English, Scottish and Irish Apple Cider and they’ve all been very very good.  I attempted to ask for Cidre in France but offended the waiter so much he didn’t speak to us for the rest of the service which we found comical.  We did find Cidre in France at a different cafe so we were all good.
Apple Travels
The French do, however, make a delicious apple pastries.  I thought I might see apple ice cream, gelato or sorbet as they like to make use of fruits in their iced treats but so far (we’ve managed to have ice cream of some sort in every county) I’ve not seen any so Tasmania still reigns as the best apple ice cream producer in my limited experience.
Apple Travels
The other apple treat I have consumed in great quantity is apple juice, my go to favourite cold beverage.  I have had single variety apple juice, green apple juice, cloudy apple juice and they’ve all been really nice.
Apple Travels

Design a site like this with WordPress.com
Get started